Plus:Dialog DatabaseAssembliesNew: Unterschied zwischen den Versionen
Len (Diskussion | Beiträge) Die Seite wurde neu angelegt: = Dialog: Database Assemblies - New Assembly = <P> This subdialog serves to create or edit a user-defined construction in the [[Plus:Dialog_DatabaseConstructions | ass... |
Tes (Diskussion | Beiträge) |
||
| (7 dazwischenliegende Versionen von 2 Benutzern werden nicht angezeigt) | |||
| Zeile 3: | Zeile 3: | ||
<P> | <P> | ||
This subdialog serves to create or edit a user-defined construction in the | This subdialog serves to create or edit a user-defined construction in the | ||
[[Plus: | [[Plus:Dialog_DatabaseAssemblies | assemblies database]]. It contains several | ||
tab sheets: | tab sheets: | ||
</P> | </P> | ||
| Zeile 10: | Zeile 10: | ||
=== "Layer Assembly": === | === "Layer Assembly": === | ||
[[Bild:WUFI- | [[Bild:WUFI-Plus_DatabaseNewAssembly.jpg]] | ||
<P> | <P> | ||
| Zeile 23: | Zeile 23: | ||
<BR> | <BR> | ||
* <B>"Database Material":</B> | * <B>"Database Material":</B> | ||
This button opens the [[Plus: | This button opens the [[Plus:Dialog_DatabaseMaterials | material database]] screen. Select the desired material and transfer it to the assembly with a double-click or by pressing the <B>"Assign"</B> button.<BR> | ||
<BR> | <BR> | ||
* <B>"Additional buttons on the right side of the screen":</B> | * <B>"Additional buttons on the right side of the screen":</B> Use this bottons to specify where the material transferred from the material database (see above) shall go:<BR> <BR> | ||
Use this bottons to specify where the material transferred from the material database (see above) shall go:<BR> | |||
** <B>"New":</B><BR> The material will be inserted as a newly created layer at the end of the table.<BR> <BR> | ** <B>"New":</B><BR> The material will be inserted as a newly created layer at the end of the table.<BR> <BR> | ||
** <B>"Delete:"</B><BR> | ** <B>"Delete:"</B><BR> Remove the highlighted layer from the table.<BR> <BR> | ||
Remove the highlighted layer from the table.<BR> <BR> | |||
** <B>"Copy":</B><BR> Copy the highlighted layer.<BR> <BR> | ** <B>"Copy":</B><BR> Copy the highlighted layer.<BR> <BR> | ||
** <B>"Insert":</B><BR> The copied layer will insert as a new layer with the same material behind the copied one.<BR> | ** <B>"Insert":</B><BR> The copied layer will insert as a new layer with the same material behind the copied one.<BR> | ||
<BR> | <BR> | ||
* <B>"Thickn. [m]":</B><BR> | * <B>"Thickn. [m]":</B><BR> | ||
Enter the thickness of the layer. You need not enter the thickness manually if you have transferred it from the [[Plus: | Enter the thickness of the layer. You need not enter the thickness manually if you have transferred it from the [[Plus:Dialog_DatabaseMaterials | material database]] together with the material data.<BR> | ||
<BR> | <BR> | ||
* <B>"Color":</B><BR> | * <B>"Color":</B><BR> | ||
Shows the used color of the material in the graphic of the designed assembly. | Shows the used color of the material in the graphic of the designed assembly. | ||
=== "Info-Text": === | === "Info-Text": === | ||
[[Bild:WUFI-Plus_DatabaseNewAssembly_InfoText. | [[Bild:WUFI-Plus_DatabaseNewAssembly_InfoText.jpg]] | ||
<P> | <P> | ||
Here you may enter any info or remarks on the construction.<BR> | Here you may enter any info or remarks on the construction.<BR> | ||
<BR> | <BR> | ||
</P> | </P> | ||
=== "Assign Catalog": === | === "Assign Catalog": === | ||
[[Bild:WUFI-Plus_DatabaseNewAssembly_Catalogue. | [[Bild:WUFI-Plus_DatabaseNewAssembly_Catalogue.jpg]] | ||
<P> | <P> | ||
The construction needs to be assigned to (at least) one of the catalogs. This tab | The construction needs to be assigned to (at least) one of the catalogs. This tab | ||
Aktuelle Version vom 1. Juli 2009, 14:04 Uhr
Dialog: Database Assemblies - New Assembly
This subdialog serves to create or edit a user-defined construction in the assemblies database. It contains several tab sheets:
"Layer Assembly":
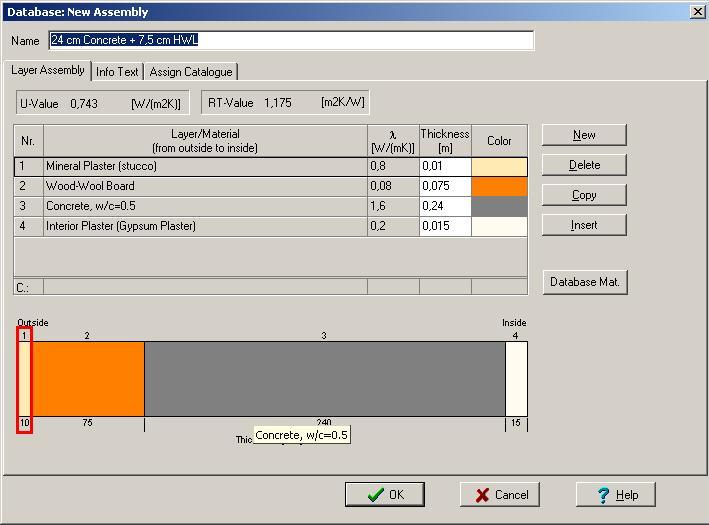
In this tab sheet you can enter, edit or view the highlighted construction.
- "Name:"
Enter the name of the construction.
- "Layer/Material":
You define the construction by editing this assembly table. This is done with the following tools:
- "Database Material":
This button opens the material database screen. Select the desired material and transfer it to the assembly with a double-click or by pressing the "Assign" button.
- "Additional buttons on the right side of the screen": Use this bottons to specify where the material transferred from the material database (see above) shall go:
- "New":
The material will be inserted as a newly created layer at the end of the table.
- "Delete:"
Remove the highlighted layer from the table.
- "Copy":
Copy the highlighted layer.
- "Insert":
The copied layer will insert as a new layer with the same material behind the copied one.
- "New":
- "Thickn. [m]":
Enter the thickness of the layer. You need not enter the thickness manually if you have transferred it from the material database together with the material data.
- "Color":
Shows the used color of the material in the graphic of the designed assembly.
"Info-Text":
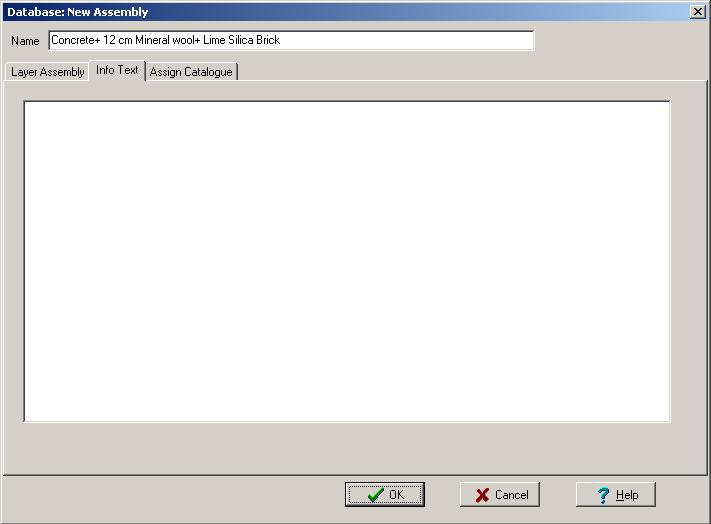
Here you may enter any info or remarks on the construction.
"Assign Catalog":
The construction needs to be assigned to (at least) one of the catalogs. This tab sheet displays a list of All Catalogs that are user-defined (you cannot assign a construction to one of the predefined catalogs).
Click the check box on the catalog to which you want to assign the construction. The construction will be added to the database when you close this dialog with the "OK" button.


