Plus 2.X:Files/Measured Data
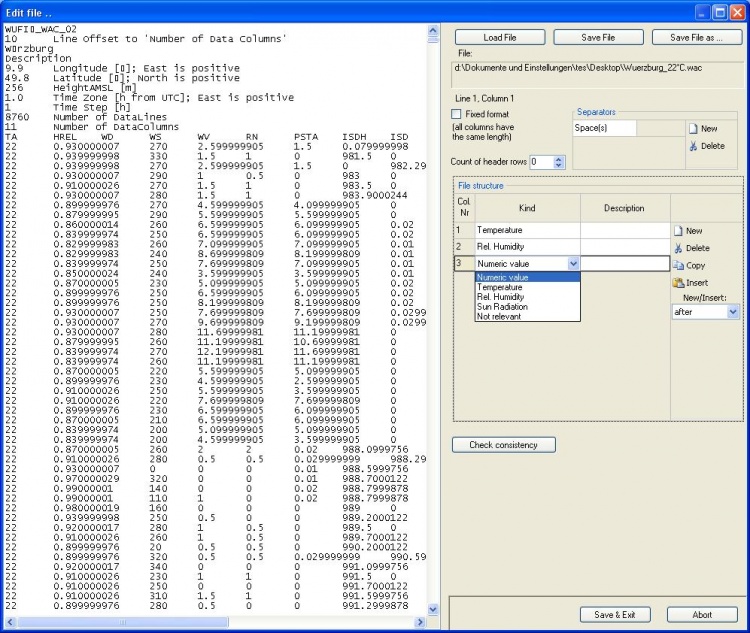
If the current project requires the use of not contained weather files or any other data it can be included in the project in the dialog "Files / Measured Data". By clicking "New" a new file is created, which can be edited with "Edit". This will open the dialog below. The data can either be uploaded or entered manually and then be processed. If the data is entered or uploaded you need to to input how the columns are to be separeted. This is possible either with a given equal length of the columns or with one or more default separators between the columns. Next count the header rows (In the picture below there are twelve). Every column in the file structure must then be assigned a type of value (numeric value, temperature, rel. humidity, sun radiation or just not relevant), therefore create new columns under file structure. For clarity name each column significantly. Next check the accuracy of the files with "check consistency". If there is a error message, check your file again, else save and exit. If a file is included to the WUFIplus project it can now be chosen in the respective dialogs (like for example for weather files, inner loads and design conditions). For better understanding see the example below.

IMPORTANT: Remember that you have to enter a time-step of calculation in the case dialog. If a file from Files/Measured Data is used the first value of it is read with the first-time step of the calculation, the second line with the second time-step and so on. If there are more time-steps than lines, the file is used again and again from its beginning. This allows entering 24 (if your time-time step is 1 hour) values for one day profile (for example for Inner Loads) which is then reused for the whole year. If smaller time-steps are used it is automatically assumed, that the loaded file provides adequate values for these (reduced) time steps. So if you time-step is 10 minutes it is of course NOT sufficient to enter 24 values for a day-profile but 144 (=24x6).
link to 2nd example